September Soap Club Challenge - Piping Techniques
- 4 Comments

So as a new soaper, and dessert lover, I decided to enter this months contest from Soap Challenge Club. I'm entering the newbie category, as this is only my second soap attempt on record. This month's challenge was piping techniques using cold process soap. I chose to do dessert soaps and use an icing technique learned in Wilton Buttercream classes. I did a total of three flavors: red velvet, lemon blackberry tort, and pumpkin spice cheesecake. For piping, I did a variation between torting and piping between all soaps using a large star tip for the red velvet filling and topping, as well as a tip #12 for the filling of the lemon.

For the lemon tart, I started by piping my lemon, modifying it, then piping the white outlines onto it; the blackberries were hand piped using a tip #12 for the base and piping the small berries with a tip #7.
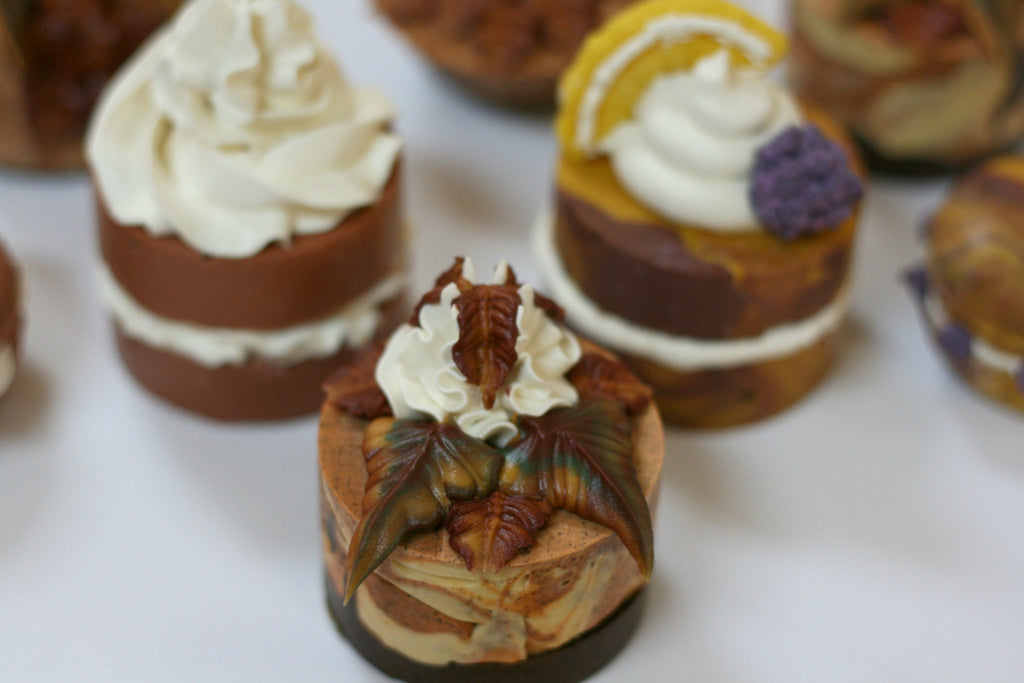
The leaves on top of the pumpkin dessert are my demonstration of both a bi-ombre and a tri-ombre using variations of red, gold and green for the fall foliage effect. The tri-color is made using the large leaf tip while the bi-color is made using a #67 tip. To achieve the ombre effect I followed Divines (video link here) commentary in using cling wrap and inserting into a disposable icing bag. I also made macarons with left over soap and icing.

All in all total hours were probably a total of 18. I notice that although my scents didn’t effect my accelerating time but the micas strangely did.
Below you can find my process in depth :)
Enjoy!
Lillian Clair - Artist & Marketing
Swampfires
Day 1: Making the soap cakes -
So I chose to use a cold process recipe featuring coconut oil, hemp seed oil, cocoa butter, shea butter, and sunflower oil. We choose not to use palm oil because of the environmental issues it promotes. More about that here.
Step one: Mixing liquid oils and melting solids.
We're opening up our retail location and haven't quite acquired a microwave yet, so Goodwill came to the rescue with crock pots! The red one is for rice and beans for dinner.


Step two: Adding the lye -
I'm promise I'm not lye-ing 😂😂😂 Sorry, I had to.
Step three: Mixing scents -
So I chose to be true to form and make my tweets smell like food. Which is funny because I really hate food scents, but seem to have a knack of capturing them in bottom form. I made a total of 3:
Red Velvet - Chocolate, bakery, and sugar
Pumpkin Cheesecake - Pumpkin pie and bakery
Lemon Black Berry - Sweet lemon, blackberry vanilla, and bakery
Each was hand mixed and weighed. Side note: I also added a stabilizer because the bakery smell contains vanilla.


Step four: Dividing colors -
Color breakdown as follows:
Red velvet - Brick red colorant with black mica
Pumpkin cheesecake - Brick red & nuclear orange colorant with black and tan walnut shells for exfoliant with added titanium dioxide for white, crust: brown and black walnut
Lemon blackberry - Yellow and plum colorants with purple micas

Step five: Adding colors and scents -
I'm very lucky that nothing really accelerated my soap. I've heard tales of seizing and it kinda made me panic.
So total 3 scents, and 6 colors.
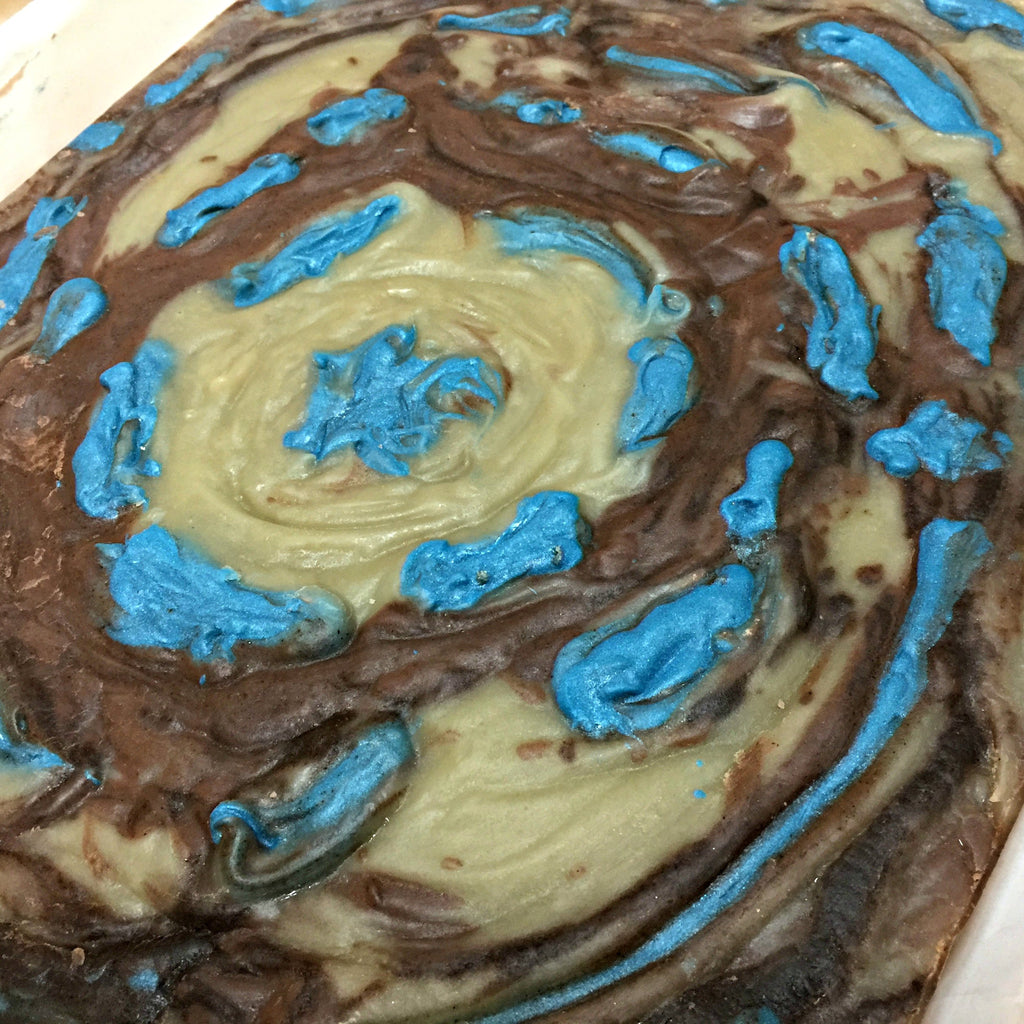
Step six: Mixing and pouring -
Now because I am neurotic and a terrible over achiever, I decided simple colors and dessert and scents simply wasn't enough, I wanted not one, but 2 in the pot swirls. By the grace of god, it worked. The lemon tart didn't come out as vibrant as I wanted and I think that's because my soap/oil base was a more cloudly and less white.
Then it's time to pour, which is a pain with silicone I have learned. I did notice that my soap was past the pouring stage, so plopping and smoothing it is! LOL
And voila! We have soap in molds and stuff! I also recently purchased a macaron mold and figured this was the time to try it. Plus I had stuff left over so I tried the new cupcake thingys too.


Day 2: *creepy silence of the lambs voice* It puts the icing on the soap

So! The great unfolding has begun! I am satisfied with the results. I don't like the air bubbles from plopping but that's my own fault, and I'm bummed about the lemon tart color but we must move on!
This is where it gets fun... and by fun I mean terribly annoying and stressful, but still good. We learned things!

Step one: Making the icing
So on day one I batched my oils and then split them 50/50. On day 2, I split them again just in case I screwed up the first batch of icing, which I did so it's good I did that. With the first attempt I thought, hey lets add lots of titanium dioxide to make things white so the colors look better. BAD. Just BAD. I used so much that it not only accelerated the soap but also caused what I think was a max saturation of color (think tea and sugar). Everything was going well but then my purple for the black berries started to get hella stiff very quickly. So of course, I sat down and began piping the hardest of all the piping first. Well an hour later and everything else is hard so we tried again.
I also noticed that because of all the colors I added to the purple it started to weep pink, which doesn't sound like that bad but when the soap is already really fricken hard and it's tiny little balls and it's weeping pink, it's really not a good weeping.


So, onto mix 2! This time I chose to not use white for the whole thing, only the icing I actually needed white. This went way better and my colors did well.

Step 2: Adding colors and creating ombres -
Well I'd love to say that I'm just so amazing and wanted 2 separate ombres for this contest (which I guess is 50% true), but in reality, I had now reached the process off fear of failure and really wanted to make sure that if one went badly I had another option LOL. I got lucky and they both turned out great.


I had heard that soap icing takes a while to set. This was VERY true for the ombre. The white didn't take that long to stiffen (even more proof that titanium is the killer of my first attempt... never. again. White does not equal pretty colors...)
But once I let it sit long enough, I ever so carefully plopped and smoothed the colors onto the plastic wrap. Side note: I realized I layered on the short side instead of the long side (the opposite of the video), but it worked out fine because I was careful not to over fill.
 |
 |
|---|
Step 3: Let the piping begin!
The white was the easiest and made icing the centers almost seamless (I think I got lucky or I'm just good with timing).
The leaves were fairly easy because of my Wilton icing classes. If you haven't taken them, please do. Joanns stores offer them. Totally worth it. The patterns and colors came naturally because of the ombre, the shape and lines came because of the movement made with my hands of a fast push pull. The veining of the leaves is because I didn't place all my colors to the edge. I left space on the edge so that when you roll them together, it creates a seam of each color. (Hopefully as seen in the pictures)

Step 4: Everyone say ooooo ahhhhh
All in all I think it went ok for my first soap experience. I had been to a class on soaping recently and being around Susan helps. Here's the done pictures! Enjoy!

 |
 |
 |
|
 |
 |

|
 |
 |
 |
Recent Posts
-
-
-
SwampFires is Spreading!
October 24, 2016
-
-
-
-
Wood Grain Opal Soap - Great Cakes Soapworks Challenge
October 12, 2016
-
-
-
-
Adventures in Mold Making Part II - Sprigs to Soap!
September 09, 2016
-
-
-
-
September Soap Club Challenge - Piping Techniques
September 17, 2016
-
-
-
-
Adventures in Mold Making Part I - Plaster Sprigs for Pottery
September 09, 2016
-


4 Comments
Love how cute all your little cakes are. They look fab!
Awesome Soap, You are very talented!
These are adorable. Keep up the good work!
I love your soapy tarts! Very Cute!